
Checklist for selecting furniture for a DIY upcycle project
Is the furniture piece solid?
Does it need any reinforcement?
Is it the right size for the area you have available?
Does the piece feature dovetail joints, which are generally the strongest wood joints?
What are the estimated costs of improvements?
Is your skill level up to the task?
Now that we’ve factored in what to look for in a furniture find, here’s what to do after you get it home.
Steps for completing your next DIY furniture makeover
Head back to Pinterest to get redesign ideas specific to the piece you’ve chosen.
Bring out the drill, saw, nails, staple gun – whatever’s in your arsenal.
Strip down the piece, removing trim or features you don’t want.
Build up the features you do want: add a shelf, permanently remove doors, swap out legs – anything that fits your new vision for the piece.
Reinforce any features that need regluing or tacking.
Sand and prime, if necessary.
Consider upgrading the hardware. This little effort can provide a lot of return.
Paint.
If you are using chalk paint (like in our example below) or want to give surfaces extra protection, finish with a water-based polyurethane.
Furniture makeover examples from the Portland ReStore
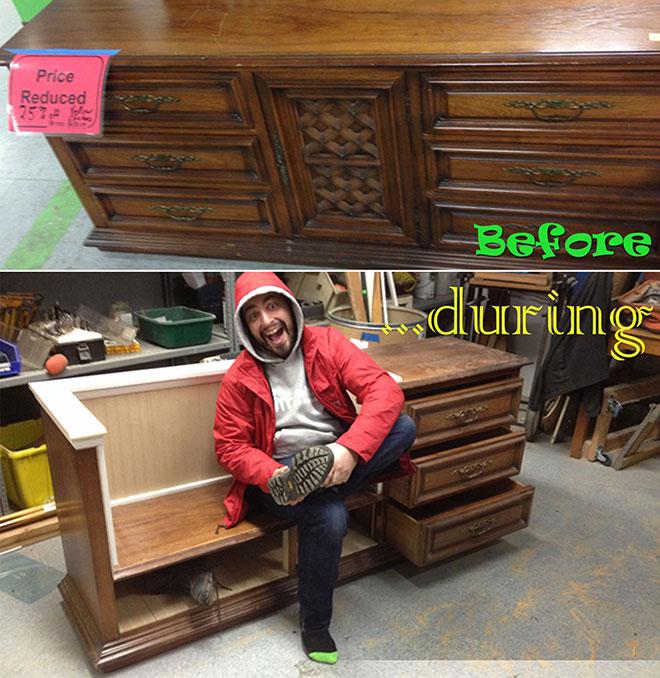
DIY: From drab credenza to bang-up bench
Beauty is in the eye of the beholder, and sometimes the beholder isn’t buying the beast. Normally, furniture flies out of the ReStore as quickly as it comes in, but sometimes a piece sits a little longer, begging for a little makeover magic.
That was the case with a credenza donated to the Habitat ReStore in Portland. It was a solid piece with dovetail joints and smooth-gliding drawers, but its dated style was causing it to be overlooked by shoppers even after a price reduction. Inspired by Pinterest, we began imagining the DIY transformation possibilities.
Get out the hammer and paint
While stuffy old credenzas are passé, multi-functional benches with a shelf for shoes or games, and drawers for gloves, keys or office supplies have definite appeal.
This credenza was composed of three elements: a center cabinet flanked by a row of drawers on both sides. We removed the fake trim that adorned the center cabinet door, along with one whole set of drawers. With hammer in hand, our in-house jack-of-all-trades craftsman (and business relations director) Mark Haley salvaged some of the pieces to reinforce a new bench panel, added some fabricated trim pieces to adorn the edges and installed bead board to finish out the backrest and interior of the newly created shoe shelf.
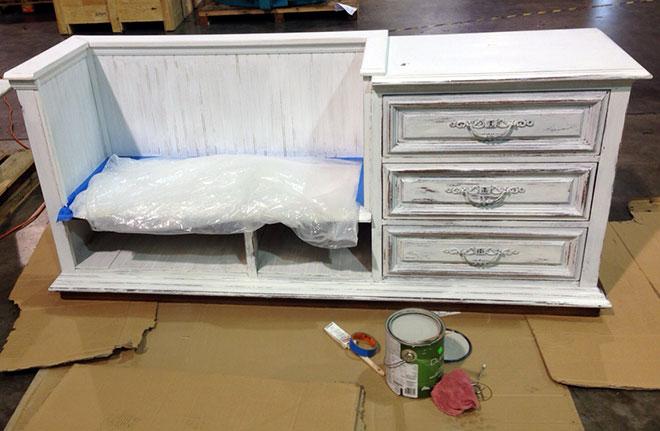
To add a shabby chic look, chalk paint was applied and lightly sanded. Normally, chalk paint is followed up with a coat of furniture wax, but we decided to go with a water-based polyurethane to protect the finish from water marks and give it a durable soft glow. Wax is beautiful but it has to be reapplied periodically and will show water marks.
Paint recommendations: When not to cut corners
We used a more expensive chalk paint to begin with, but when we needed more we tried a cheaper brand that totally backfired. We ended up having to do it again with the more expensive product.
Polyurethane comes in water-based and oil-based versions. Note that the oil-based poly will yellow slightly after a short time. This can be just the tint you want to achieve; if not, go with the water-based poly. Clean up is much easier with the water-based poly. Either way, I prefer two-three coats with a light sanding between coats.
Making a show of it!
The whole DIY upcycle project was designed as a display at the Portland Spring Home & Garden Show, but as it evolved we were inundated by purchase requests for the credenza practically from day one.
Martha Cerna is Communications and Marketing Manager at the Portland/Vancouver metro area Habitat ReStores.
